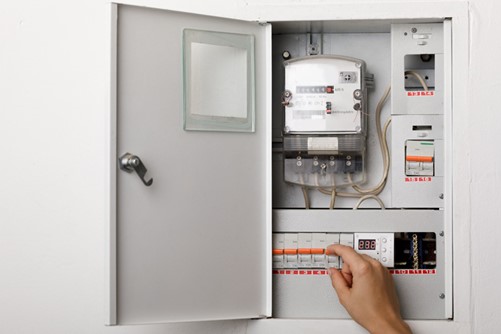
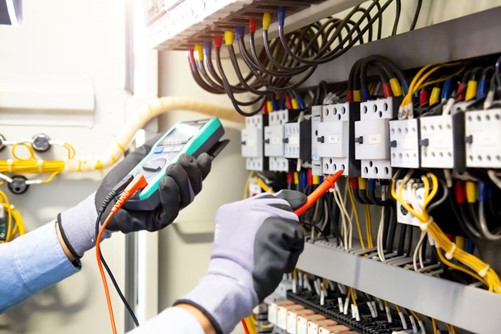
A “whole-house surge protector” is basically a hard-wired electrical system that provides protection from unexpected power surges. This could cause irreversible damages to the electrical appliances in your home. It helps in nullifying power surges by sending the excessive electrical energy into the ground. Thus ensuring the safety of all electrical appliances that are plugged into the mains.
Power surges, also known as voltage spikes can be caused due to various reasons. Lightning strikes, faulty power lines, substantial changes to the demand of the power grid, etcetera, are some of the reasons behind the electrical spikes that can damage household appliances.

Table of Contents
Electrical surges and how to avoid them from damaging household appliances?
Every house sometimes faces issues of electrical surges. They can be either large or brief ones resulting in overloaded electrical circuits. As a result which, home owners might have to pay large amounts of money in repair or to replace the damaged devices. Depending on how many appliances are connected to the mains at the time of spike, the losses can even run into thousands of dollars.
As a homeowner, you can easily avoid this situation by installing whole-house SPD or surge protection device. It helps in monitoring the large surges of electrical energy and redirecting the surplus safely into the ground. In the following sections, we will discuss on how to install an SPD and if you can do it on your own.
Is it possible to install a whole house surge protection all alone?
In the market, two types of surge protection devices are available. One of them is known as Type 1, which is “meter-based surge protector” and the other one is Type 2 or “panel-based surge protector.” Type 1 devices are usually installed outside the electrical meter of a home. Type 2 devices are mainly installed inside and in the main electrical panel of a house.
These Type 2 protectors are easy to install and any skilled home-owner can install that all on their own just by following the instructions. On the other hand, Type 1 devices are quite hazardous in terms of installation. It is better to get it Type 1 devices installed by professionals only. While installing the Type 2 surge protection device, the person trying to install should make sure that the main electrical panel is shut off. Just to make sure every other breaker of the panel is de-energized.
However, the installer should still remember that high residue voltages and live wires that can still cause serious injuries. Or even lead to death if came into contact accidentally. Hence, it is suggested that if any person does not feel quite confident doing this job alone, he or she must contact a professional electrician.

Tools and materials required to install a whole house surge protection
Now, let’s discuss the various tools and materials required as well as the steps for installing whole-house surge protection.
Tools and Materials required:
- Personal protective tools
- ‘No-contact’ voltage tester
- ‘Double-pole’ circuit breaker
- Drill or Screwdriver
- Wire strippers
- Cable clamp
- Hammer
- Nail punch
5 steps for successful installation of whole house surge protection device
Step 1: Shut off the powerStep 2: Prepare the panelStep 3: Mount the surge protectorStep 4: Connect the wiresStep 5: Reassemble the electrical panel
Step 1: Switch off the mains
Before installing, the main breaker-switch needs to be turned off that is situated at the topmost corner of the panel. It helps to de-energize every breaker which is inside the panel and lessen the risk of fatal accidents due to “electrocution”. After that, the screws need to be removed which hold the panel cover in its place by using any power drill or screwdriver. When all the screws are removed, remove the cover of the panel carefully.
Now, use a voltage tester which is “non-contact” for verifying whether the electrical supply has stopped or not. For that, the black “live” wires need to be touched with the tester. If the tester gets to lighten up that means the electricity is still running in the circuit. In this case, the person should stop working until he/she makes sure that the power is shut off entirely. If facing issues in shutting power, one must contact a professional or licensed electrician for help. It is recommended that you make use of cardboard cut outs while testing the “live wires” to help lessen the risk of contacting them.
Step 2: Preparing the panel
To operate the surge protection device or SPD, a dedicated breaker with a double pole is required for connection. The breaker has two wire terminals and needs two breaker slots. It is installed just next to the “main breaker” that is located inside the panel. If the slots have breakers already, they need to be relocated towards other slots that are available in the panel. But if there is no space left in the panel, then an electrician needs to be hired for installing another separate sub-panel.
After that, one of the “knockouts” needs to be removed from a place that is closest to the breaker so that the wires can be fed well into the panel. The person installing the device can use a hammer and nail punch or pliers to remove the knockout easily. When you did that, a properly-sized cable clamp has to be inserted into the hole. And finally, the device has to be secured according to the instructions provided by the manufacturer of the SPD.
Step 3: Mounting the surge protection device
The wires that come from the “surge protector” are usually in four colour-codes. One is green which represents the ground, one is white which is neutral, and the remaining two are black that represent hot (supply or live wires). If these wires come fully insulated, the person who is installing the device needs to remove around 1 centimetre of the insulation from the end of every wire by using a wire stripper. After that, the wires are to be inserted in the knockout as well as the cable clamp. Once done, tighten the cable clamp. Now, mount the device on the wall by using the provided screws beside the knockout where the wires were already inserted.
Step 4: Connecting all the wires
In most houses, there is a “single” bus bar in the electric panel. This is basically a vertically positioned metal strip available with punched holes that are presented horizontally with screws on the top to connect to ground as well as neutral wires. Insert the stripped end of the ground and neutral wires into their respective positions and tighten the screws up. Once done, pull them gently to check whether they are secured properly. Then, connect the black wires to the breaker which has a double pole. You should be able to find the appropriate breaker to be connected to by following the instructions manual.
The breaker with a double pole has two terminals into which you will have to insert the wires. Loosen the screws of the terminals before inserting the wires, and after proper insertion tighten the screws back. Now, after the “live wires” are connected properly, the breaker needs to be installed within the available slots you have created in step two. Just by using moderate pressure, the breaker can be tucked into the slot.
Step 5: Reassembling and testing the electrical panel
In the final step, place back the panel cover and fasten the screws of the cover. Now, switch on the main breaker and the breaker of the SPD if it’s not on yet. Some SPDs are available with a digital display or indicator light to let the installer know when the device is fully functioning. If it is fully functioning, your home is now completely protected from any type of electrical surges. You can also use the “surge protection strip” to connect sensitive electronic devices like televisions, computers, tablets, etc., to be on a much safer side.
Best whole house surge protectors of 2022
Are you looking for a good whole house surge protector? Make sure to read our review article about the best whole house surge protectors of 2022!
